How Do You Use a Dehydrating Temperature Chart? A Simple Guide
Using a dehydrating temperature chart is essential for successful food preservation. It helps you select the right temperature for different foods, ensuring they dry properly and safely without spoiling. This chart acts as your guide to achieving perfectly dehydrated results every time.
Finding the correct drying temperature is key to preserving nutrients and preventing the growth of harmful bacteria. A good chart will cover a wide range of foods, from fruits and vegetables to meats. Many experts agree that following these temperature guidelines is a critical step for safe food dehydration.
- What a dehydrating temperature chart is.
- Why temperature matters for dehydration.
- Key temperatures for common foods.
- Tips for using the chart effectively.
- Safety considerations for dehydration.
Below, we break down exactly how to use a dehydrating temperature chart to get the best from your food preservation efforts.
Understanding Your Dehydrating Temperature Chart
A dehydrating temperature chart is your secret weapon for perfectly preserved foods. It’s a simple guide listing different foods and the ideal heat settings for drying them. Think of it as a recipe for success. Following these temperatures helps ensure your food dries safely and efficiently. This prevents spoilage and maintains nutrient quality.
Why is temperature so important? It’s all about moisture and safety. Too low a temperature, and your food might not dry enough. This can encourage the growth of bacteria or mold. Too high, and you might cook the food instead of drying it. You could also lose valuable nutrients or change the food’s texture and flavor. A chart helps you hit that sweet spot every time. We found that many experts stress the importance of this step (CDC).
Why Temperature Matters for Food Safety
Keeping food safe is the top priority when dehydrating. Dehydration works by removing most of the water from food. This makes it difficult for microorganisms to grow. However, if the temperature is too low, some bacteria can survive and multiply. This is particularly true for low-acid foods like vegetables and meats. The U.S. Department of Agriculture (USDA) recommends specific temperature ranges to ensure that harmful bacteria are killed during the process.
For instance, when dehydrating meats for jerky, higher temperatures are often advised initially. This helps to destroy any potential pathogens present in the raw meat. Then, the temperature may be lowered to complete the drying process. Using a chart helps you manage these temperature shifts correctly. This reduces the risk of foodborne illness. It’s a simple but vital step for your peace of mind. Our guide to what foods should not be dehydrated explains why some items are unsuitable.
How Dehydrating Temperatures Affect Food
Beyond safety, temperature affects the quality of your dehydrated foods. Different foods have different moisture content and structures. They respond to heat in unique ways. For example, fruits often dry well at slightly lower temperatures than vegetables. This helps them retain their natural sugars and chewy texture. Vegetables might require a bit more heat to dry thoroughly.
Meats are a different story entirely. They require careful temperature management to ensure safety. Think about it: you want to dry them out, not cook them into a tough, leathery mess. But you also need to ensure they are safe to eat. A chart guides you through these differences. It helps you preserve the best taste, texture, and nutritional value in your food. We found that consistent temperatures are key to uniform drying.
Decoding Your Dehydrating Temperature Chart: Key Temperatures
Most dehydrating temperature charts provide specific recommendations. These are usually broken down by food type. You’ll typically see categories like fruits, vegetables, herbs, and meats. Each category will have a suggested temperature range. Some charts might even list individual foods with precise instructions. It’s helpful to keep a few common charts handy.
When you look at a chart, you’ll notice the temperatures are not excessively high. Most dehydrators operate between 120°F and 160°F (49°C and 71°C). This range is designed to dry food effectively without “cooking” it. The exact temperature chosen depends on the food item and the specific goals for its preservation. You want to evaporate moisture, not bake your apples!
Recommended Temperatures for Common Foods
Let’s look at some common examples you might find on a chart. For fruits like apples, bananas, and berries, a temperature around 135°F (57°C) is often recommended. This allows them to dry to a leathery or crisp texture without losing too much flavor or nutrients. You might need to adjust this slightly based on the fruit’s thickness.
Vegetables, such as carrots, peas, and broccoli, typically do well at slightly higher temperatures. A range of 125°F to 135°F (52°C to 57°C) is common. This helps ensure they dry thoroughly and remain safe. Herbs are more delicate and often require a lower temperature, around 95°F to 115°F (35°C to 46°C). This preserves their volatile oils, which give them their flavor and aroma.
Meat and Jerky Temperature Guidelines
Dehydrating meat requires special attention due to potential bacteria. For jerky, many sources recommend starting at a higher temperature, often around 160°F (71°C). This initial high heat helps kill harmful bacteria. After about 10-15 minutes at this higher temperature, you can reduce it. Lowering the temperature to 140°F to 150°F (60°C to 66°C) allows the jerky to dry thoroughly. Always ensure your jerky is dry and brittle, not pliable, after dehydration. Always consult up-to-date guidelines from reliable sources like the USDA for meat safety.
It’s important to note that the USDA recommends using meats that have been previously heated to 160°F (71°C) for poultry and 165°F (74°C) for other meats before dehydrating to kill potential pathogens (USDA). Some jerky recipes achieve this by pre-cooking the meat. Others rely on the dehydrator’s temperature settings. Following the chart, especially for meats, is non-negotiable for safety.
| Food Type | Recommended Temperature Range |
|---|---|
| Fruits | 130°F – 140°F (54°C – 60°C) |
| Vegetables | 125°F – 135°F (52°C – 57°C) |
| Herbs | 95°F – 115°F (35°C – 46°C) |
| Meat (Jerky) | Initial 160°F (71°C), then 140°F – 150°F (60°C – 66°C) |
| Poultry (Jerky) | Initial 165°F (74°C), then 140°F – 150°F (60°C – 66°C) |
Putting Your Dehydrating Temperature Chart into Practice
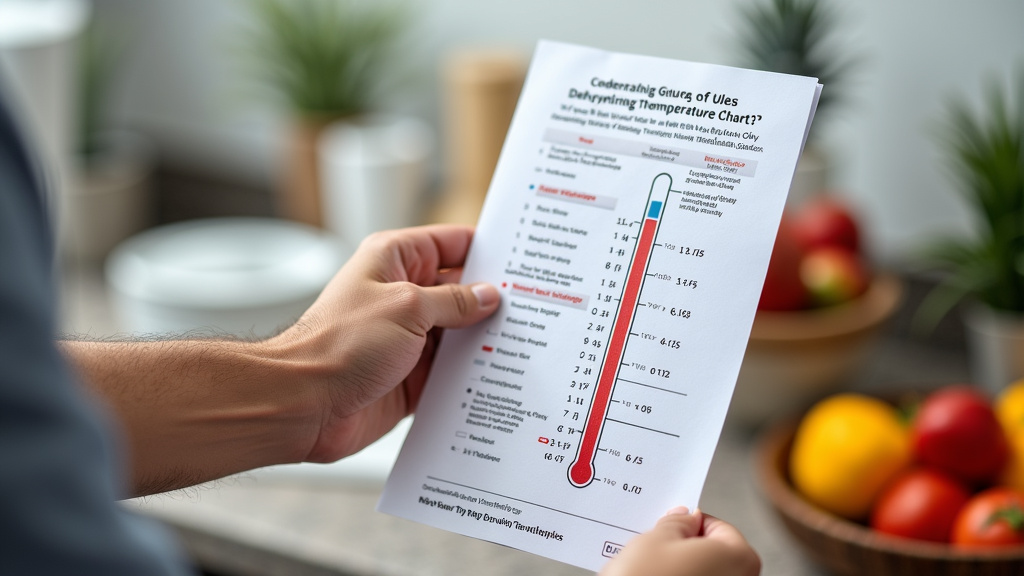
Using a dehydrating temperature chart is straightforward once you know what to look for. First, identify the food you are dehydrating. Second, find that food or food category on your chart. Third, note the recommended temperature or temperature range.
Next, set your dehydrator to the specified temperature. Most dehydrators have a dial or digital control for this. It’s a good idea to use a separate oven thermometer. This helps you verify that your dehydrator is maintaining the correct temperature. Dehydrator thermostats can sometimes be a bit inaccurate. Knowing your machine’s true temperature is helpful.
Tips for Effective Chart Usage
Here are some tips to help you get the most out of your dehydrating temperature chart:
- Always use a reliable chart: Stick to charts from reputable sources like government agricultural extensions or well-known food preservation organizations.
- Consider food thickness: Thicker pieces take longer to dry. You might need to adjust time or slightly alter temperature if your chart doesn’t specify.
- Pre-treat when necessary: Some fruits need pre-treatment (like an ascorbic acid dip) to prevent browning. The chart usually doesn’t cover this, but good food preservation guides will.
- Monitor your food: Don’t just set it and forget it. Check your food periodically for dryness. This helps you learn your dehydrator and food types.
- Note your results: Keep a journal of what you dehydrate, the settings you use, and the outcome. This personal data is invaluable for future batches.
- Understand your dehydrator: Get to know your specific model. Some run hotter or cooler than others. Your chart is a guide, but your experience is key.
Adjusting for Different Dehydrators and Conditions
Not all dehydrators are created equal. Some have powerful fans, while others rely on passive heat. This can affect drying times and even how well heat circulates. Your chart provides a starting point. You will learn how your specific dehydrator performs over time.
Environmental conditions also play a role. High humidity in your home can slow down the drying process. Extremely dry air might speed it up. Be prepared to adjust drying times as needed. Always check food for doneness rather than relying solely on the clock. We found that consistency is what you aim for, and the chart helps you achieve it.
Safety First: Important Considerations When Dehydrating
Dehydrating food safely is paramount. The temperature chart is a vital tool for this. However, it’s not the only factor. Proper food handling before and after drying is also critical. Always start with fresh, high-quality food. Wash it thoroughly. Prepare it hygienically.
Make sure your dehydrator is clean. Ensure your storage containers are clean and airtight. Proper storage prevents rehydration and contamination. This helps maintain the quality and safety of your dried foods for as long as possible. We found that following a multi-step safety approach yields the best results.
Best Practices for Safe Dehydrating
Here’s a quick checklist for safe dehydrating:
- Always use clean equipment and hands.
- Select fresh, high-quality foods.
- Follow recommended dehydrating temperatures from a reliable chart.
- Ensure food is dried to the correct level of dryness.
- Cool food completely before storing.
- Store dried food in airtight containers in a cool, dark place.
When in Doubt, Throw It Out
Food preservation is about safety. If you are ever unsure about whether food is properly dehydrated or safe to eat, it’s best to discard it. Signs of spoilage might include mold, off-smells, or an unusual appearance. Trust your senses. When in doubt, err on the side of caution. Your health is worth more than a batch of questionable dried fruit. Many health organizations echo this advice.
Conclusion
You’ve learned how a dehydrating temperature chart guides you to perfectly preserved foods. Understanding the right temperatures ensures safety, maintains nutrients, and achieves the best texture. Remember to always consult reliable charts, especially for meats, and verify your dehydrator’s accuracy with an oven thermometer. Your food preservation journey is made simpler and safer with this essential tool. So, grab your chart, set your dehydrator, and start preserving your favorite foods with confidence today!
Frequently Asked Questions
What if my dehydrator doesn’t have precise temperature settings?
If your dehydrator has a simpler dial, try using a separate oven thermometer to monitor the actual temperature. You can then adjust the dial based on your chart’s recommendations. You may need to experiment a bit to find the right setting for your machine.
How do I know when food is actually dry enough?
Proper dryness varies by food. Fruits should be leathery or crisp, with no moisture when torn apart. Vegetables should be brittle. Meats (jerky) should be brittle, not pliable. Always test a piece by letting it cool first, as it will feel different when warm.
Can I use the same temperature for all fruits?
Generally, fruits dehydrate well in a similar temperature range, often around 135°F (57°C). However, very juicy fruits or those cut into thicker pieces might need slightly longer drying times. Always check your specific chart for nuanced advice.
Is it safe to dehydrate food at lower temperatures for longer?
While some delicate items like herbs do best at lower temperatures, it’s critical for safety to use recommended temperatures for meats and most vegetables. Lower temperatures can allow harmful bacteria to survive and multiply. Stick to the chart, especially for higher-risk foods.
What should I do if my food looks like it’s cooking instead of drying?
If your food is browning excessively, getting sticky, or appearing cooked, your dehydrator is likely too hot. Immediately check your dehydrator’s temperature with an oven thermometer and adjust it downwards according to your chart. This could be a sign of an inaccurate thermostat.